INSTALLATION
RIDE MORE - SKY RIDE AND MAC RIDE INSTALLATION INSTRUCTIONS
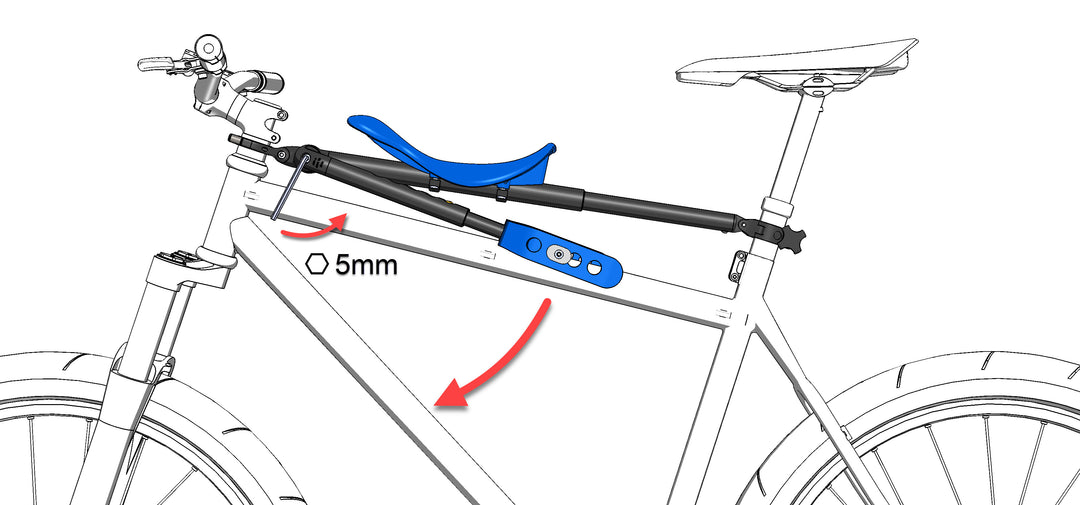
1. INSTALL RIDE MORE FRONT MOUNT SPACER
If you are unfamiliar with removing the stem and spacers please consult your local bike shop for assistance. Always check with a professional bike mechanic if you are not 100% confident during installation.
Spacer Install Steps:
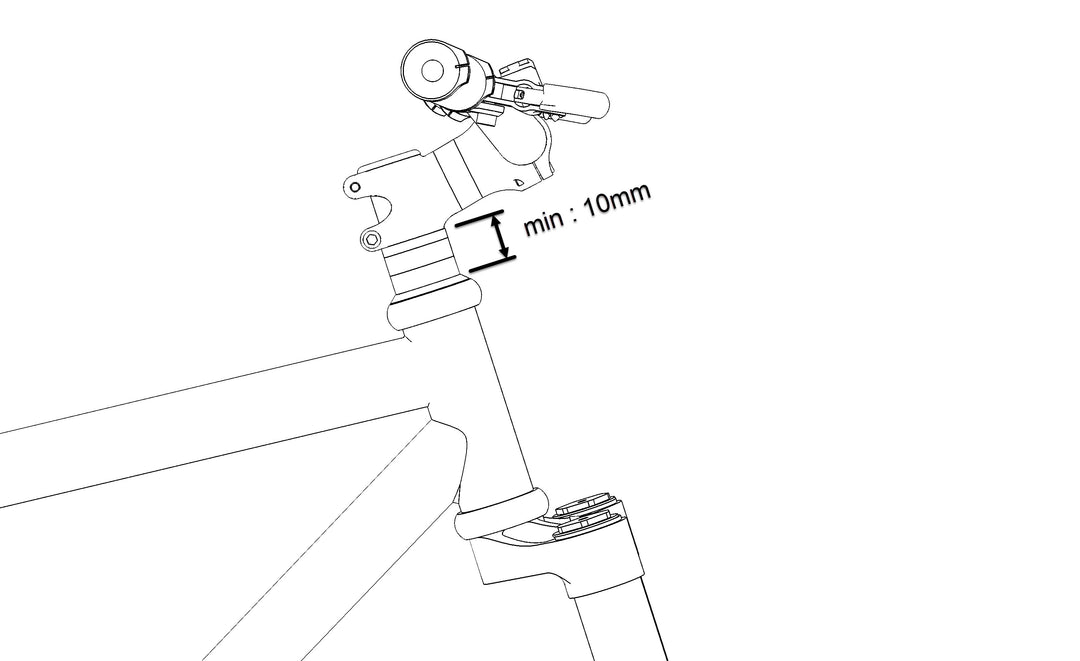
a. Locate 10mm of spacer on steerer tube
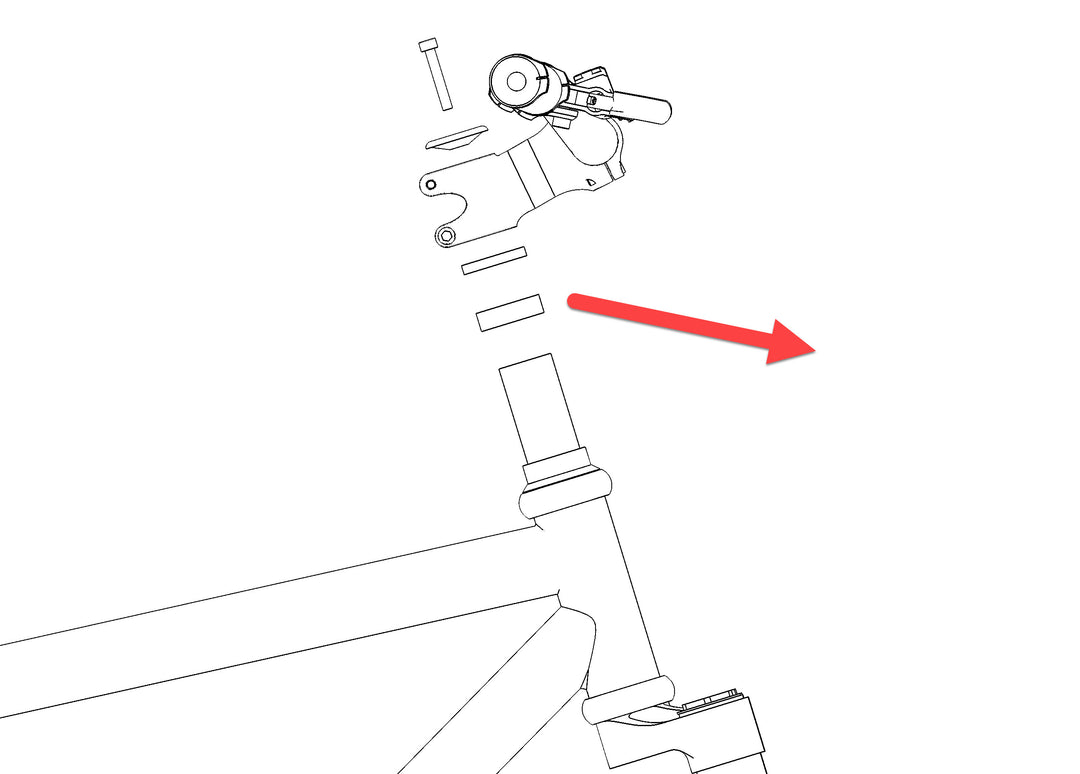
b. Remove 10mm of original spacer
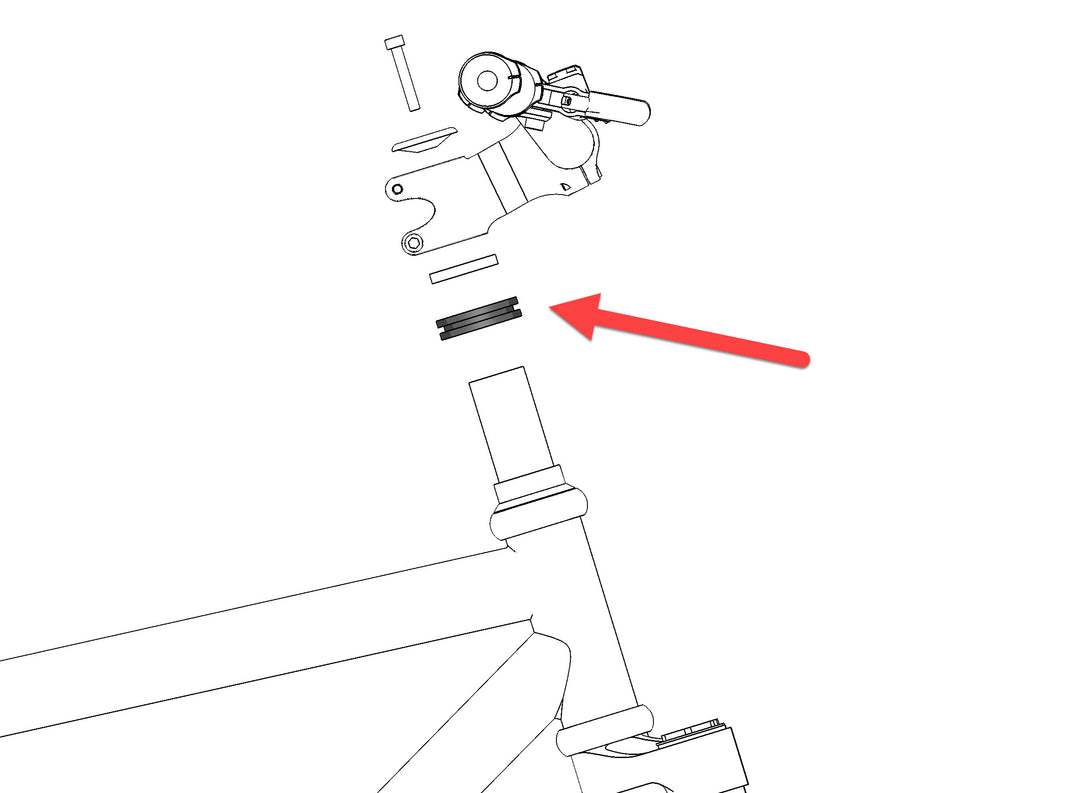
C. Replace with 10mm Mac Ride front mount spacer
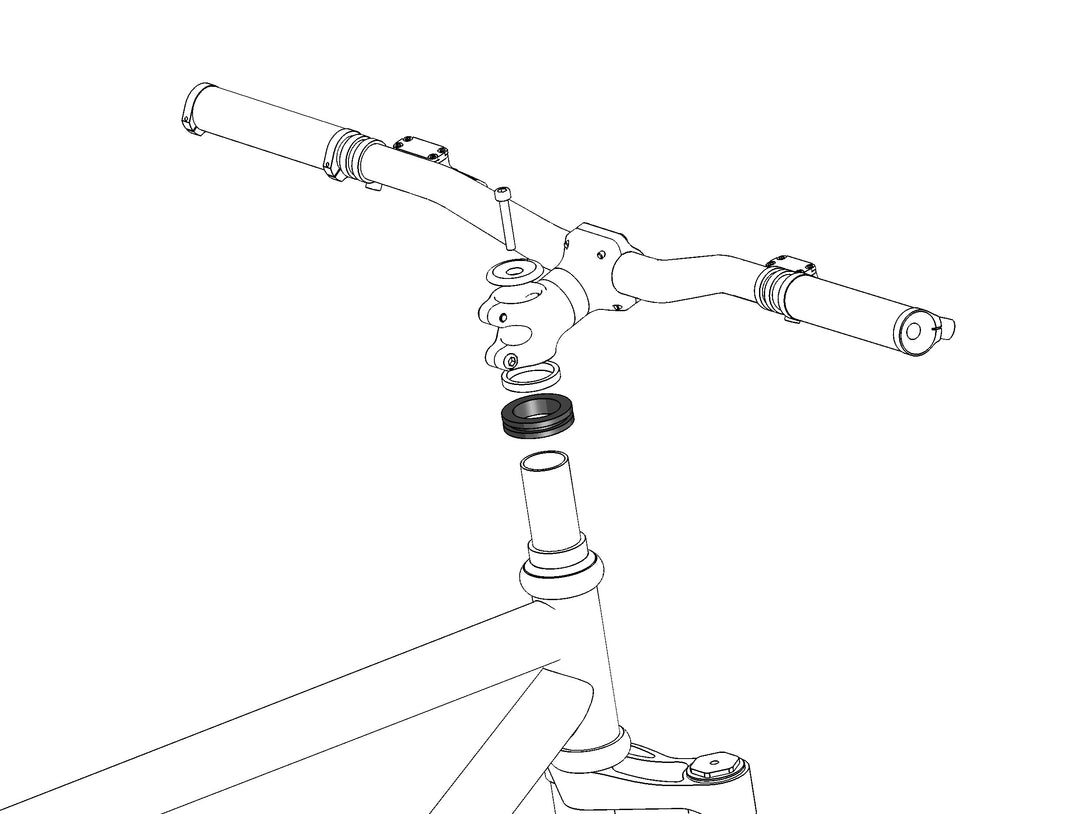
d. With the special spacer mounted, you can leave it in place and easily install and remove your Mac Ride seat.
2. SKY RIDE INSTALL - COMING SOON!
3. MAC RIDE INSTALL
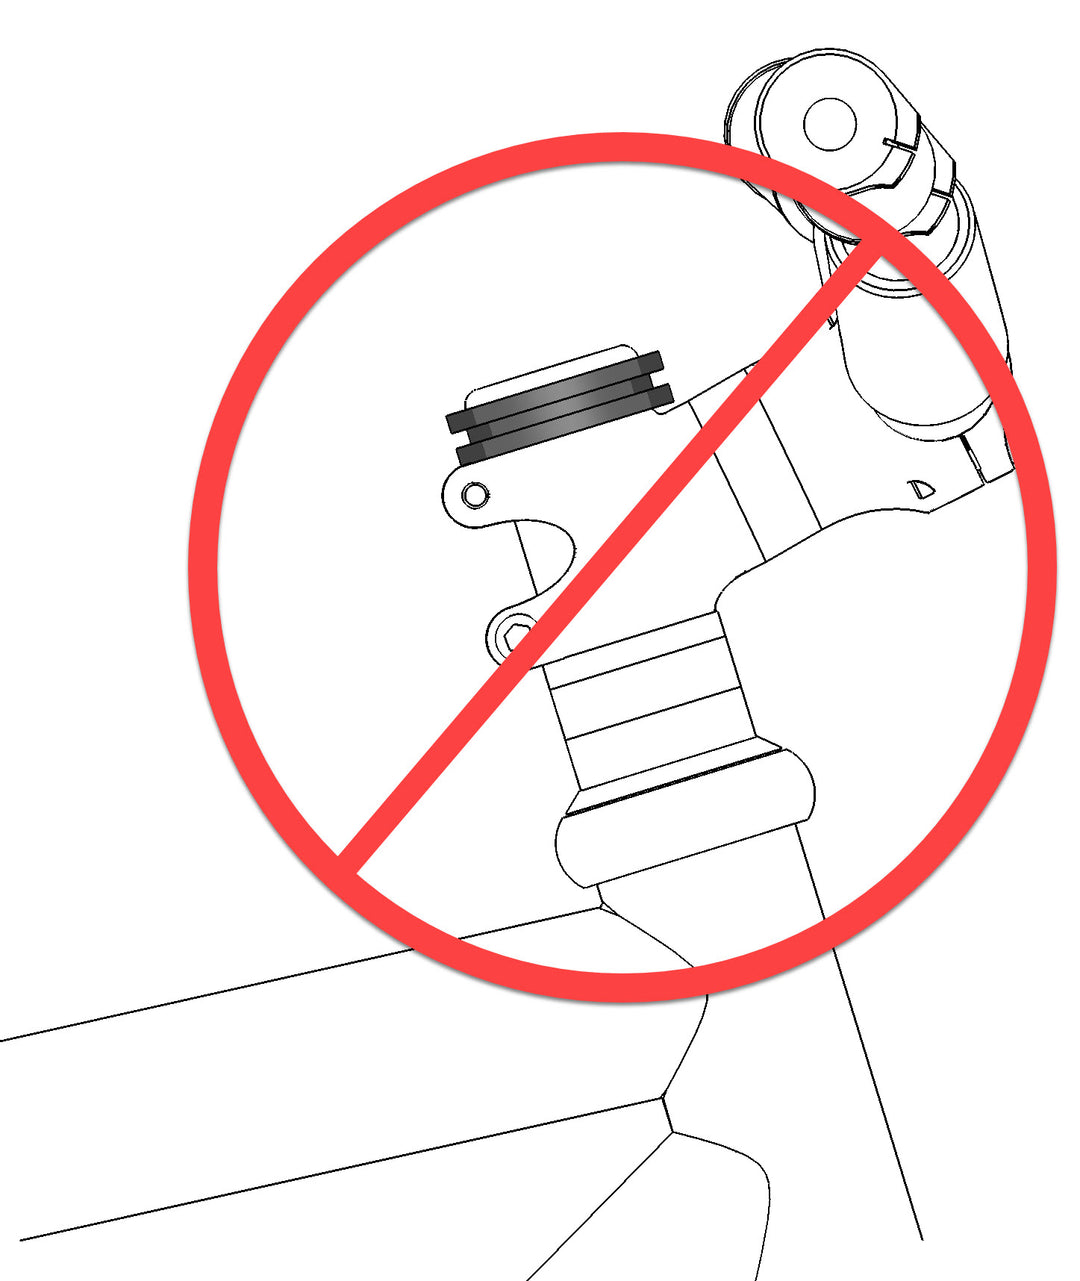
Mount to Headset Spacer
Mount to Seat Post
Dropper Seat Post Scenario:
This image is for a "dropper post" - do not attach Mac Ride to the portion of the seat post that moves up and down; attach to the collar below.

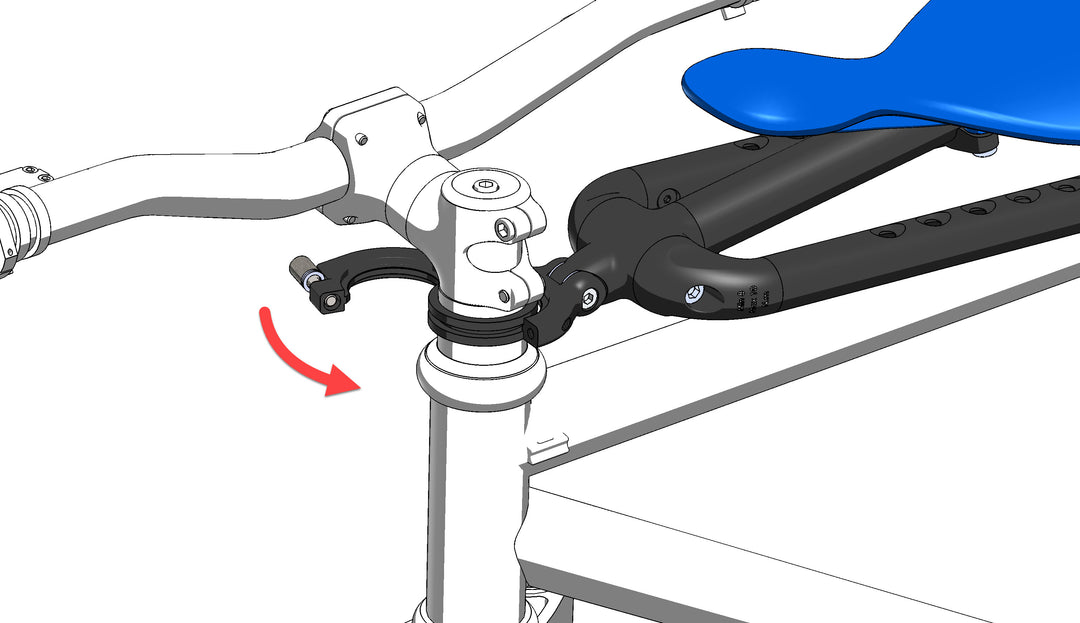
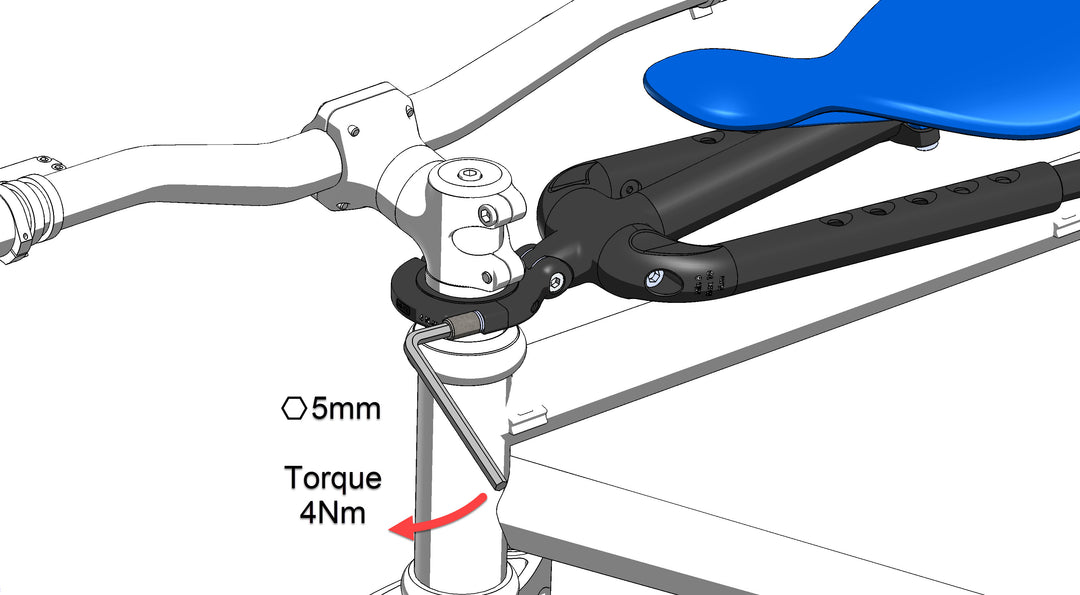
Standard Seat Post Scenario (no dropper)
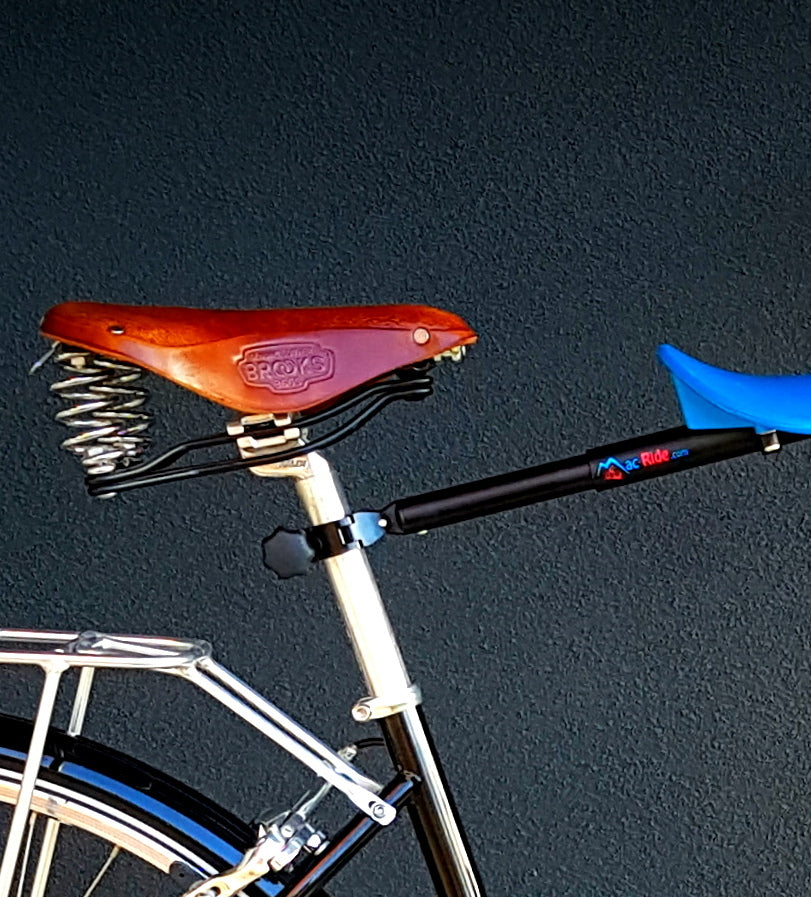
For standard seat posts, with no dropper, attach to the seat post itself, and do so at any point, ideally the spot that makes Mac Ride the most comfortable for your child.
4. ADJUSTMENTS
1A. Pivot stirrups to correct angle, so child's feet are clear of front wheel
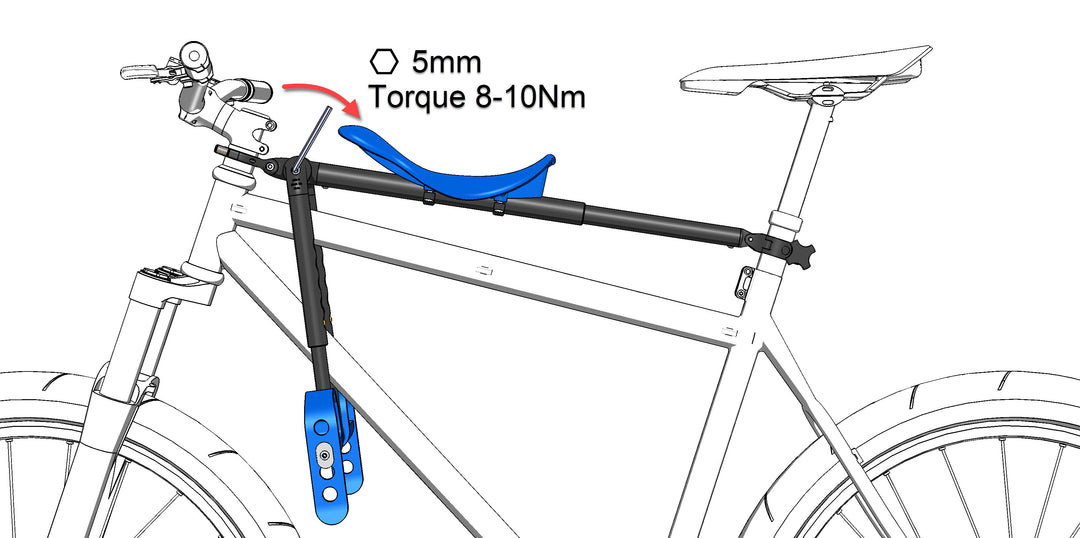
1B. Tighten bolt as below. Stirrups must be secure, not able to move/pivot while riding.
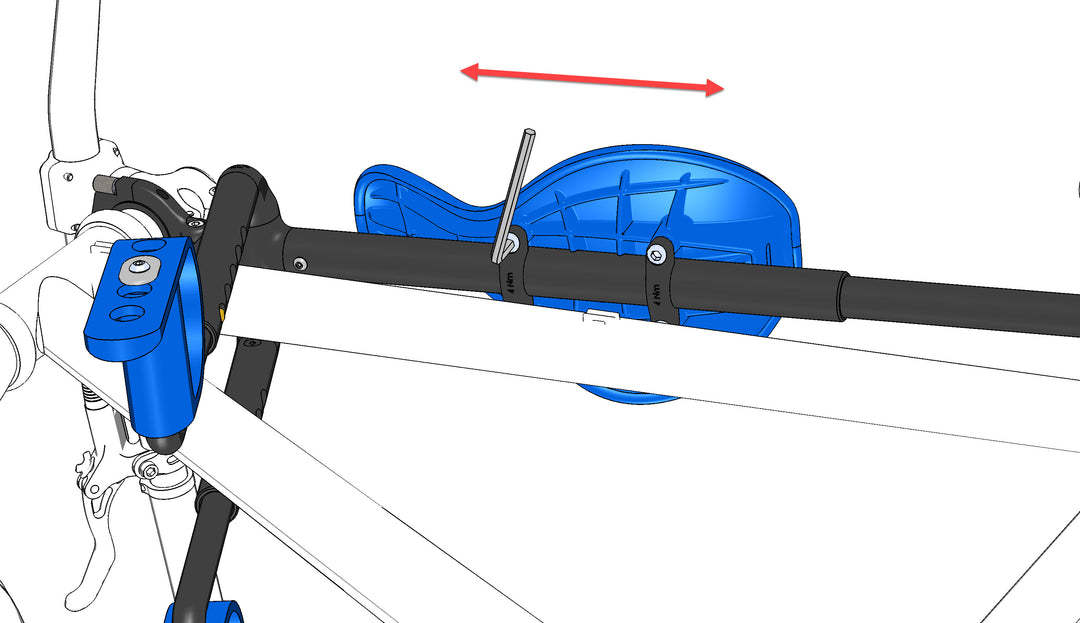
2. Adjust saddle forward (for smaller children) and back (for older children)
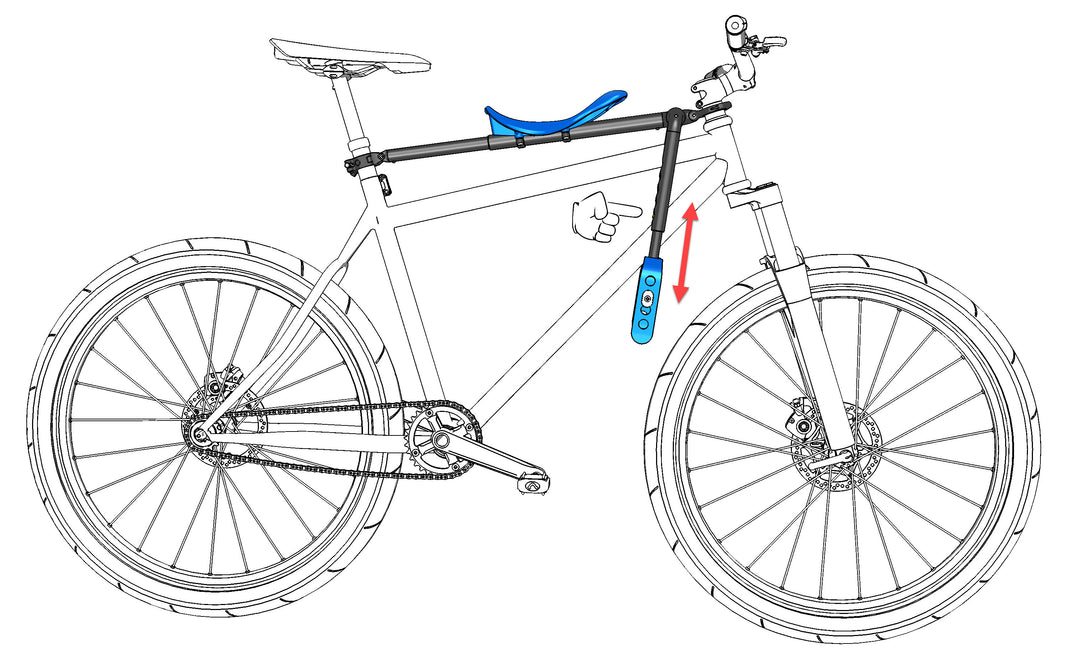
3. Shorten/Lengthen Stirrup as needed
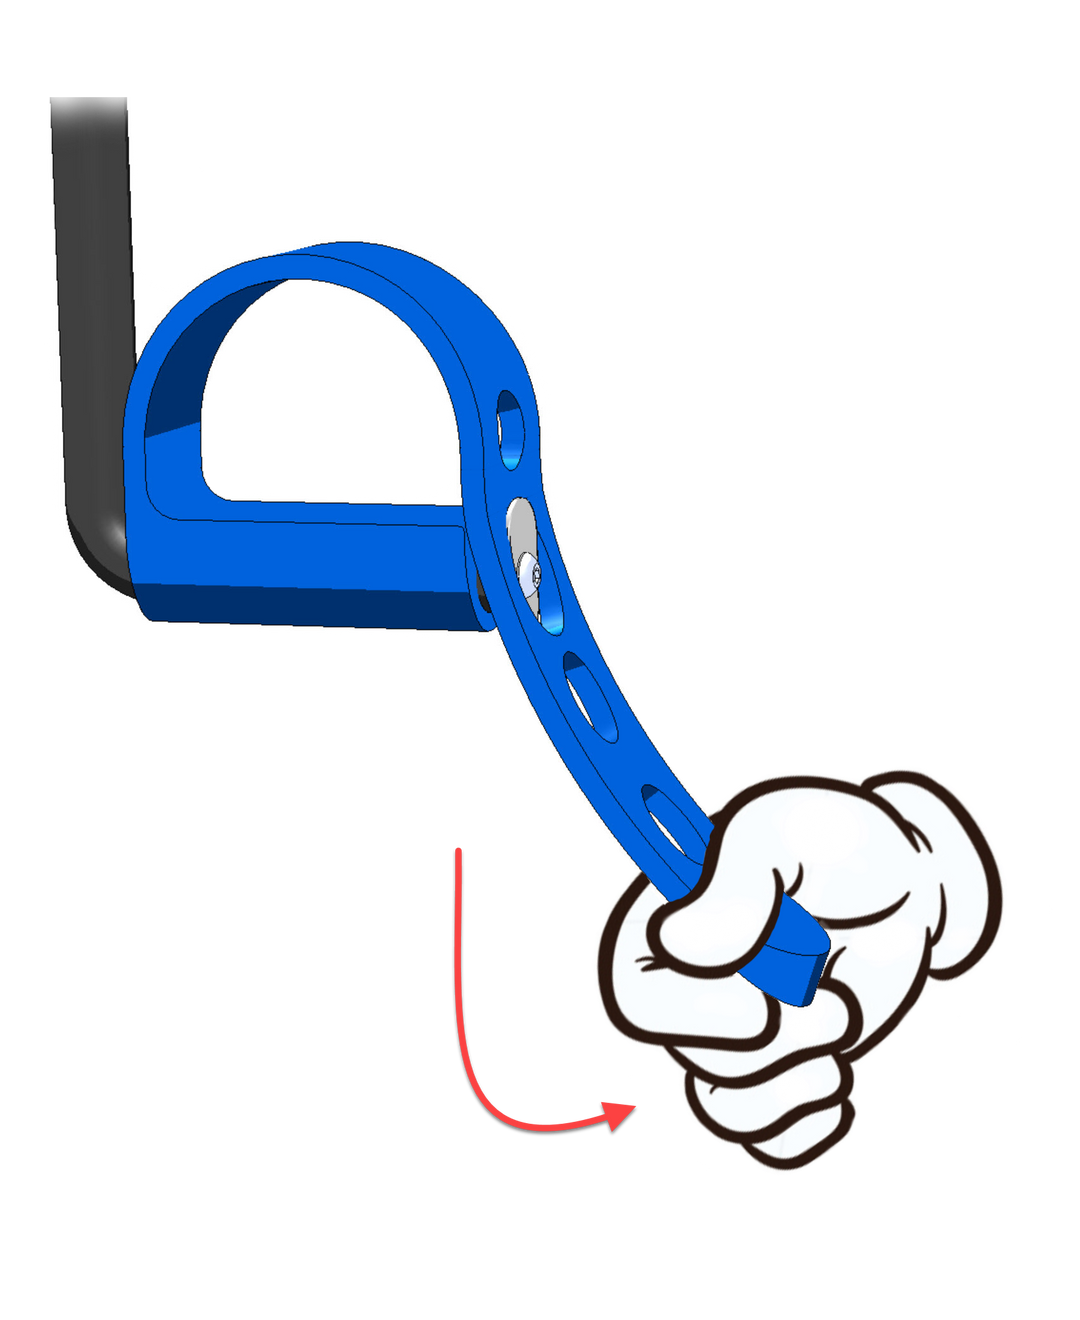
4. Adjust foot strap by pulling rubber strap down and away, over the bolt at the end of the foot rest.
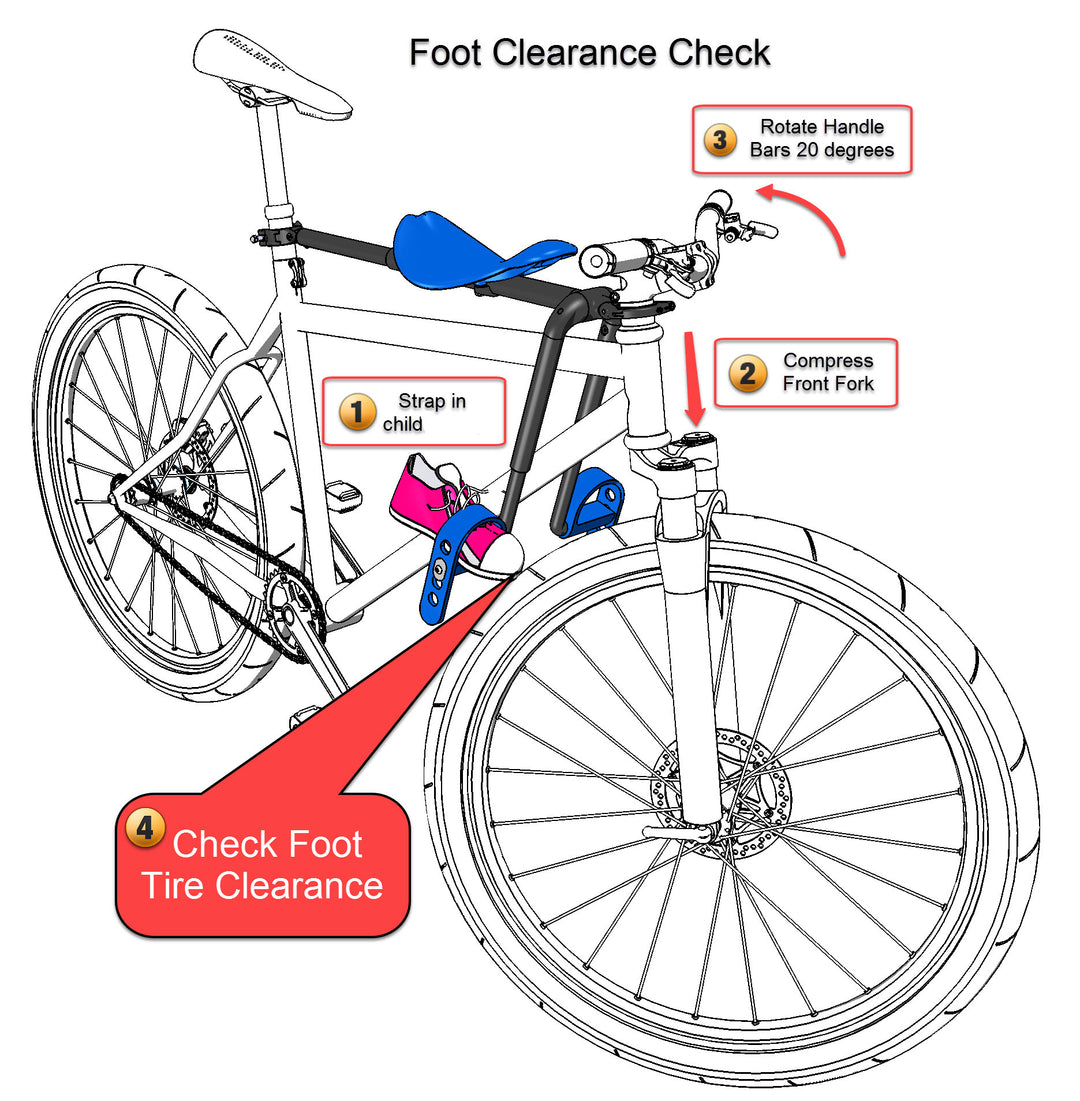
SAFETY CHECK
Always remember to perform the foot clearance test- all four steps- making sure you can safely turn your front wheel, even when the shocks are fully compressed.


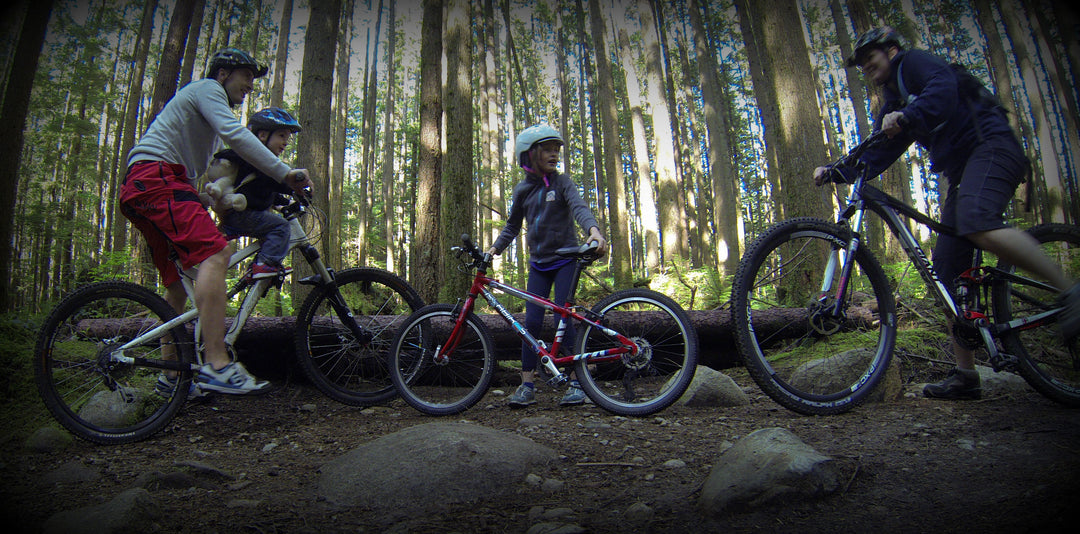
Ready to ride more?
Shop our child bike seats + accessories, and start riding more, together.